Bathroom Vanity Parts Names

Bathroom Vanity Parts Names

Most people have at least a vague idea of how a bathroom sink works, but some might have less understanding of what all the parts are called – which can be a problem if you need to buy replacements. To help, here we discuss the various bathroom sink parts and what they do.

Bathroom sink drain parts

bathroom sink parts diagram
Image: wayfair

1. Shut-off valve

The shut-off valve is where the water reaches your sink system from the main supply. If you want to stop water flowing into your sink, you can shut it off at this valve before doing any plumbing work on your sink.

Water reaches these valves under pressure, and there are normally two valves, one for hot water and one for cold.

The water arriving at the hot water shut-off valve comes from your water heater while the water arriving at the cold shut-off valve comes directly from your main supply.

2. Ferrule and compression nut

The shut-off valve connects to the water supply line, which takes the water up to the faucet. The two are connected by a ferrule and a compression nut to ensure a firm, watertight seal.

3. Water supply line

The supply line, also known as a supply tube, is a short section of pipe that carries the water from the shut-off valves up to the faucet.

Water arrives in the water supply line under pressure, which is what forces it up to the faucet, ready to flow out when you open the faucet.

4. Faucet handles

This part is familiar to everybody. Faucet handles come in many shapes, styles and sizes, but their purpose is the same. You turn the faucet handles to open them when you want water and you turn them in the opposite direction to close them when you want the water to stop.

You may have either one or two faucet handles. In some models, you have one for hot and one for cold while with others, hot and cold water is controlled with one lever.

5. Faucet
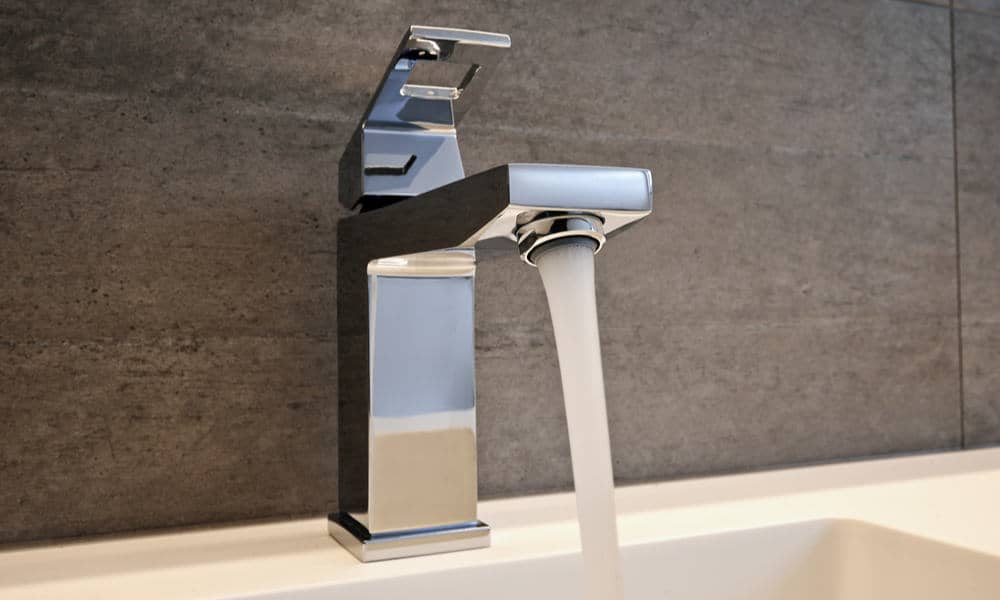
Faucet

Another very familiar part of the bathroom sink, the faucet – also known as a "tap" – is the part the water comes out from.

6. Lift rod handle

This is the part that controls the stopper. You normally pull it to lower the stopper and push it to raise the stopper.

7. Pop-up stopper

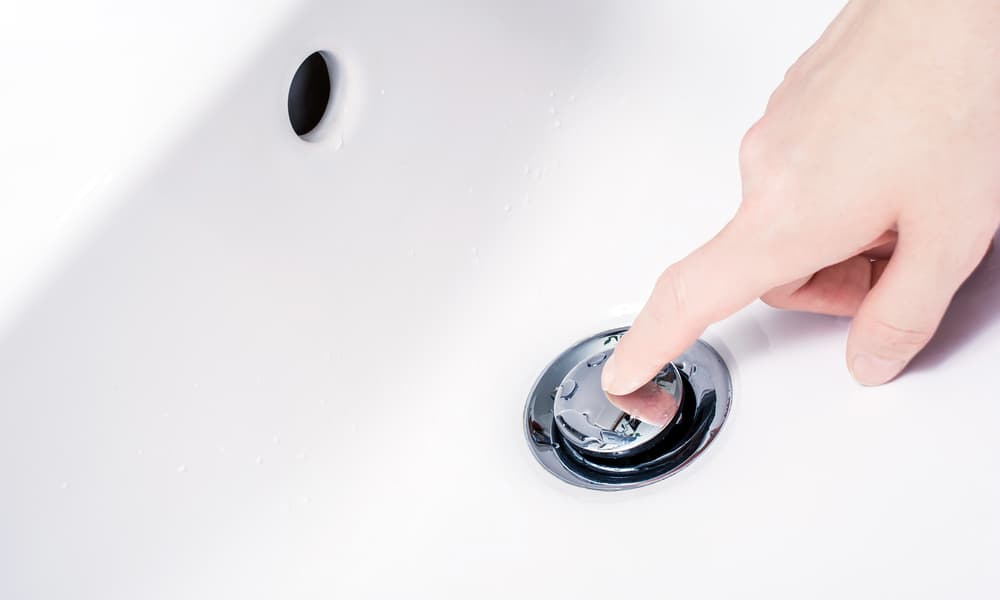
The pop-up stopper is the part that sits in the plug hole and moves up or down when you use the lift rod handle. Sometimes bathroom sinks don't have these, instead, incorporating a stopper on a chain that you simply use by hand.

8. Pop-up flange

The pop-up flange is the part where the pop-up stopper moves up and down in the plug hole and that keeps the system watertight, preventing any water from dripping through.

9. Gasket and washer

The housing for the pop-up stopper (if you have one), including the pop-up flange, is connected to the next section by a gasket. This also contains a washer to ensure a watertight seal and prevent any leaks.

10. Locknut

Below the gasket and washer, there is a locknut that secures the upper part of the drainpipe to the tailpiece, the part that takes the water down to the P-trap.

11. Tailpiece

The tailpiece is the section of pipe that takes water and other waste from the sink down to the P-trap and through to the waste pipe.

12. Tailpiece mount
Tailpiece mount

If your sink has a pop-up stopper, it will also have a tailpiece mount. This is the part where the horizontal rod that works the stopper meets the tailpiece. This rod moves up and down to control the pop-up stopper.

If you need to remove the stopper, either for unblocking a clogged sink or for another reason, you will have to unscrew it from the tailpiece mount.

13. Pivot nut

The pivot nut is what connects the stopper rod to the tailpiece mount. This piece allows the pivot rod to move up and down, controlling the stopper. To remove the rod, you need to unscrew this nut.

14. Stopper pivot rod

If you have a sink with a pop-up stopper, there are a few pieces that connect the lift rod handle to the stopper. The pivot rod is a horizontal piece of metal that meets the tailpiece at the tailpiece mount and is held in place by the pivot nut.

It is connected to the stopper inside the tailpiece, and when you use the lift rod handle, it moves the rod, which in turn, moves the stopper up or down.

15. Spring clip

The spring clip is a small clip, usually metal, that attaches the rod to the clevis strap.

16. Clevis strap

The clevis strap is a vertical strip of metal with holes in that is connected to the rod at the bottom and the lift rod handle at the top in sinks with a pop-up stopper.

When you pull the handle up, the strap moves up pulling the end of the rod it is connected to up with it. This causes the other end of the rod to move down, and since the rod is connected to the stopper, this pulls down the stopper, blocking the drain.

When you want to pull the stopper up again to drain the sink, you push the handle down and this moves the strap down. The pushes the other end of the rod up, pushing the stopper up and allowing the water to flow away.

17. Tailpiece slip nut

The tailpiece slip nut is a nut that connects the tailpiece to the P-trap. It will also contain a washer to ensure a watertight seal.

If you need to remove the P-trap for cleaning or other purposes, you need to unscrew the tailpiece slip nut to free the P-trap, allowing you to disconnect it from the tailpiece.

18. P-trap
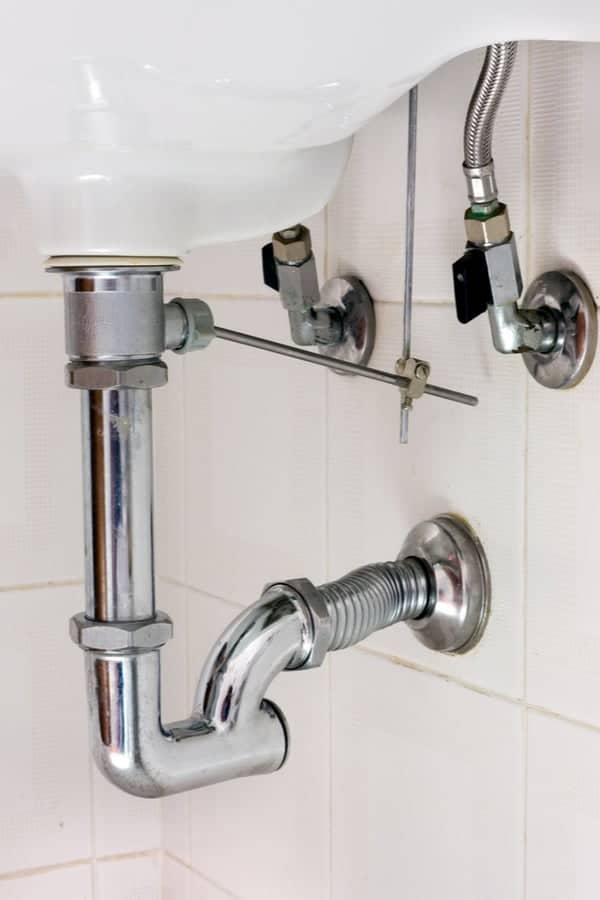
P-trap

The P-trap is a bend in the drainpipe that allows water and other waste to flow through but that retains a certain amount of water after each use to form a seal.

This is important because, without a trap, gases from the sewer would be able to pass up through the pipe and into your home, creating an unpleasant odor.

P-traps are so named due to the shape of the bend, which looks a bit like the letter "P".

Some P-traps also include a clean-out plug, allowing you to clean the trap easily without needing to remove the trap completely.

Unlike the water that arrives at the faucet, the water leaving the sink through the drain is not under pressure, relying on gravity alone.

Gravity causes the water to flow down through the tailpiece, and the weight of the water is enough to push it through the P-trap while leaving enough water in the P-trap to create the necessary seal against bad odors.

19. Trap assembly

The trap assembly consists of the P-trap itself along with several other pieces that connect the P-trap to the waste pipe while also preventing any leaks.

20. Waste pipe

The waste pipe is the final part of the sink's drain system that takes the waste that passes through the P-trap out towards the sewer system.

A few plumbing tips

Here are a few tips about which parts to look at if you experience any problems with your bathroom sink's plumbing system.

Blocked sink – stopper

If your sink becomes blocked, the first thing to check is the stopper since this section can easily become clogged with hair. All you need to do is unscrew the pivot nut and remove the pivot rod.

This will allow you to clean the upper section with a hair removal tool, which, in most cases, will solve any problems with blockages.

Blocked sink – P-trap

If the sink is blocked and the problem is not due to hair and gunk in the upper section, you may also try cleaning the P-trap section.

If your P-trap is a model that has a clean-out plug, the job is much easier. You just open the plug, drain out any water and pull out anything that has become stuck in there, screw the plug back on, and you're ready to go.

However, if you don't have a clean-out plug, you will have to remove the whole P-trap and trap assembly section to gain access. This is not an especially difficult job, but it's much more complicated than just opening the clean-out plug.

Shut-off valves

Whenever you need to do any maintenance jobs like this, the first step should always be to shut off the water at the shut-off valves. This will prevent water from running into the sink as you work.

After closing the shut-off valves, it's always sensible to work with a bucket beneath the sink since this will catch any water that runs out of the system when you start to disassemble the different sections.

Variations are possible – but most are similar

Not every bathroom sink is the same, and you may find that yours is slightly different to what we have described here. However, most are fairly similar, and with this guide, you should be able to identify the various components of your sink.

Bathroom Vanity Parts Names

Source: https://www.sunrisespecialty.com/bathroom-sink-plumbing-parts

Share:

Tile Before Or After Bathroom Cabinets

Tile Before Or After Bathroom Cabinets

  • Bathroom

Quick Tip: Laying Bathroom Tile

Successfully laying bathroom tile requires careful planning.

How to Tile a Bathroom, Laying Bathroom Tile

Photo: Flickr

While many people consider laying bathroom tile a do-it-yourself project for money-saving reasons, there are many factors that can make or break the job. This quick guide shows you how to tile a bathroom correctly.

Bathroom Tile Installation
Once you've determined the type of tile you need, think about how it will be installed. The substrate, or what tile is installed on top of, is just as important as the tile itself. A flexing floor or a wall that is uneven can lead to broken tiles and failed grout.

Water-resistant backer board, not drywall, should be used under the tile that will get wet. Whether it's backer board, plywood or concrete, the substrate needs to be sound, clean and dimensionally stable. Surfaces need to be level or plumb and true to plane, as the pros say. That means no bumps.

Any cracks or voids can compromise even the best tile job. The only way to be sure the tile sticks fast is to use a notched trowel to apply adhesive to the substrate.

Create Space
The space between the tiles should be uniform, so use spacers if your tiles don't come on mesh sheets. The larger the tile, the larger the space should be between them. Some do-it-yourselfers will make the mistake of pushing tiles too close together to reduce grout lines. Without enough surface area, grout won't bond well and can fail prematurely, leaving room for leaks and water damage. It's also very important to let the adhesive cure fully.

Follow Instructions
Follow the manufacturer's instructions and stay off the installation the required amount of time before you grout the tile.

Tile Before Or After Bathroom Cabinets

Source: https://www.bobvila.com/articles/282-quick-tip-laying-bathroom-tile/

Share:

Bathroom Decor Design Ideas

Bathroom Decor Design Ideas

85+ Small Bathrooms That Are Big on Style

What these bathrooms lack in square footage, they make up for in high design.

elle decor small bathroom roundup

Trevor Tondro

Big things can indeed come in small packages—just take a look at your tiny bathroom. Because of the limited square footage and opportunities to change the layout, it's common to write off a small bathroom as a design afterthought. But in reality, a powder room or guest bath offers a great chance to experiment with a bold color palette, eye-catching tiles, or cool hardware. And, with the right design tricks, you can easily strike a balance between form and function—regardless of your bathroom's size.

Fortunately, you don't have to look far to find inspiration: We've scoured the archives and highlighted the very best small bathroom ideas here. With more than 85 rooms to peruse—featuring whimsical wallpaper and any number of other artful touches—there's bound to be a bright idea here that suits your space and style.

1 of 87

Mirror, Mirror

In this turnkey London townhouse, designer Jean-Louis Deniot added a large geometric mirror to this soothing space. The result? A well-appointed bathroom that's practical, too.

3 of 87

High-Contrast Excellence

What's black and white and chic all over? This petite bathroom Ann Pyne designed for her Manhattan client. Not only does the high-contrast color palette offer lots of drama, but the mirror-lined walls create the illusion of a larger space.

4 of 87

One-Shade Wonder

If you want to make a big statement in a small bathroom, stick with a monochromatic palette. The inky blue Alisa Bloom used in this Chicago penthouse is equal parts moody and magnificent.

5 of 87

Take a Soak

Just because you have a small room doesn't mean you necessarily have to skimp on a soaking tub. Steal this idea from a decent-sized bathroom: Martin Cooper and Karen Suen-Cooper moved the Clawfoot Supply tub to the corner in their upstate New York home, maximizing the space and offering an exquisite view.

6 of 87

Gorgeous Galley

It turns out, a galley bathroom is a space-efficient layout. George Bevan optimized this petite room in California by trading in the soaking tub for a shower and adding a lengthy counter.

7 of 87

Shower Alfresco

Tight on space? In some locales, you can take part of your bathroom outside. In her Cartagena, Colombia, vacation home, jewelry designer Chiqui de Echavarría gave her outdoor shower an ornate, otherworldly edge.

8 of 87

Wainscoting Wonder

Tiles are the go-to wall treatment in most small bathrooms. But as this Marie Flanigan–designed space in Houston proves, wainscoting can be a striking—and less predictable—alternative.

9 of 87

Old Meets New

Previously owned by the actress Ava Gardner, this Madrid apartment is bursting with rich history. Designer Isabel López-Quesada recreated its storied magic by transforming a 1940s inlaid dresser into an unconventionally cool vanity.

10 of 87

Turn a Negative (Space) Into a Positive

Embracing negative space is a surefire way to make the most of limited square footage. This colorful Mumbai home takes a space-efficient approach with its brass sink, which was made from a wok.

11 of 87

Back to Nature

Make the most of a small space with the help of Mother Nature. From the custom cement sink to the branch accents, artist and photographer Anita Calero's Colombian home pays homage to the great outdoors.

12 of 87

A Stylish Sink

To make your small bathroom stand out, all you need is one statement piece. When Michael K. Chen renovated this apartment on Manhattan's East Side, he put a Cassiopeia marble vanity front and center. The custom mirror by Kin & Company and the Lindsey Adelman sconces highlight the vanity's "wow" factor.

13 of 87

Soothing Subtlety

As Amanda Gunawan's Los Angeles guest bathroom proves, subtlety can make a huge statement. The architect decked out her limited space with a custom concrete sink, a vintage mirror, and sconces from West Elm.

14 of 87

Art of the Matter

If your bathroom is small—but has a bare wall to spare—take a cue from Mauro Guerini and Jürgen Hilow-Iwaszura's Milan apartment. The couple paired a portrait of a widow from a Milanese family with a sink and mirror from Sbordoni and a tub by GEA Construction.

15 of 87

The More, the Merrier

Why settle for one piece of art when you can enjoy a few? In her New Orleans home, the writer Julia Reed filled her bathroom gallery wall with early-19th-century prints of Napoléon and Pope Pius VII.

16 of 87

Take Flight

When it comes to decorating a small bathroom, go big or go home. In this whimsical New York apartment in SoHo, designer Sasha Bikoff covered the powder room in charming wallpaper from Christian Lacroix. (The butterfly pattern seen here goes nicely with the throw pillows she deployed in the living room.)

17 of 87

Sitting Pretty

From the strategically placed alcoves in the Brèche de Médicis marble walls to the slim Junya Ishigami chairs, this Parisian apartment makes the most of its small bathroom—and looks good doing it.

18 of 87

Hello, Yellow

A small bathroom is a great place to add an unexpected pop of color. For example, this Moroccan bathroom certainly makes a statement—the walls and floor are covered in Popham Design's Hex Long Shadow.

19 of 87

Bold Bathroom

In their apartment in Manhattan's West Village, Jonathan Adler and Simon Doonan embrace their bold style by covering the walls in penny tiles from Artistic Tile, along with vintage prints and an extravagant medallion courtesy of Hermès.

20 of 87

Up in the Air

For this Oakland bathroom, the only way to go is up. Designer Patrick Printy covered the ceiling in a leaf-patterned wallpaper; he brings the design back down to earth by anchoring the room with a bold bust and console vanity.

21 of 87

Selling Sunset

Behind every eye-catching bathroom is a beautiful color palette. With burgundy tiles, blush pink walls, and a shower curtain in warm tones, actress and activist Sophia Bush's small bathroom in the Hollywood Hills is the design equivalent of a gorgeous sunset.

22 of 87

Mix and Match

Even a small bathroom has room for more than one type of tile. Swedish It girl Babba C. Rivera added cool nonchalance to her space by pairing white rectangular tiles with a penny style on the floor.

23 of 87

Wondrous Wallpaper

A whimsical set of wallpaper make a big statement in a small space. In this Elizabeth Roberts–designed brownstone, a crisp custom Calacatta marble sink is paired with the Hermès Jardin d'Osier wallcovering from Dedar.

24 of 87

Total Terrazzo

Architect Javier Robles lends his artful eye to every room of this Hamptons home—including this guest bathroom. The engineered marble that lines the wall and counters is from Max Lamb, while the fittings come courtesy of Boffi.

25 of 87

Oceanic Oasis

In this Newport Beach home, designer Shannon McLaren Wilkins redefines the California cool aesthetic with modern pops of color and a Mediterranean flair. The guest bedroom, which took 15 iterations to perfect, features a wall of glossy green tiles and artwork by Anna Ullman to bring the home's beach surroundings inside.

26 of 87

Opt for Opulence

Belgian-born, London-based interior designer Philip Vergeylen gives every room of this 25,000-square-foot,Georgian-style mansion in London an air of opulence. The custom black-lacquer paneling in the powder room is inset with Gracie wallpaper.

27 of 87

Textured Treatment

Designer David Netto relied on bold colors and mixed materials to revitalize this Upper East Side prewar home. The juxtaposition between the stone shower and terrazzo floor creates a modern, nuanced environment. Subway tiles from Datile, a stoic St. Thomas Creations sink, and Benjamin Moore's Deep Royal bridge the gap between the two textures.

28 of 87

Old-World Charm

Retail guru Patricia Greene's Upper East Side home exudes old-world charm. In the guest bathroom, the sink and fittings are by Waterworks, the mirror is by RH, Restoration Hardware, and the walls are clad in tiles by Mosaic House.

29 of 87

Traditional Meets Modern

A seamless blend of elegance and comfort are on full display in a Houston home designed by Paloma Contreras. The powder room features a neutral Phillip Jeffries wallpaper, sink fittings from Kohler, Ralph Lauren Home sconces, and a vintage rug.

30 of 87

Hand-Painted Detail

For a Chicago powder room, ED A-Lister Steven Gambrel settled on graphic hand-painted wallpaper by Gracie to complement the sink and floor in Onyx Fantastico marble. The vintage faucet was salvaged from Bunny Mellon's Manhattan townhouse. The sconce is by Blackman Cruz.

Kelsey Mulvey is a freelance lifestyle journalist, who covers shopping and deals for Marie Claire, Women's Health, and Men's Health, among others.

This content is created and maintained by a third party, and imported onto this page to help users provide their email addresses. You may be able to find more information about this and similar content at piano.io

Bathroom Decor Design Ideas

Source: https://www.elledecor.com/design-decorate/room-ideas/g302/small-bathroom-ideas/

Share:

Bathroom Stub Out

Bathroom Stub Out

Asked by: Ayyub Schafhauser
asked in category: General Last Updated: 5th February, 2020

What does stub out mean in plumbing?

Stub Out. The pipes that go to the toilets, sinks, showers and drains--as well as any pipes that vent to the roof--must be in place and tested before the walls are added. The process of laying these pipes, and putting protective plugs or caps to keep building debris out, is called a plumbing stub out.

The plumbing stub-outs are the end result of the rough-in phase of plumbing a residential or commercial building. They are usually installed while the walls are still uncovered; and after the drywall work and painting is complete, a plumber comes back and hooks them up to the plumbing fixtures.

Secondly, how far should a stub out extend through a finished wall? Like the supply stub-outs, the drain stub-out extends from a fitting -- usually a sanitary tee -- to a point 3 or 4 inches beyond the wall. The drain, which is usually 2-inch plastic pipe, maintains a minimum slope of 1/4 inch per foot from the stub-out to the point where it ties into a main waste pipe.

Hereof, what is an electrical stub out?

By Cassandra Tribe. Pipe stub outs are the sections of pipe that feed from the lines run underneath a slab or building, through the slab, then connect to appliances, or eventually continue on to the upper levels of your building.

What is a pipe stub?

Pipe Stub Out Pipe stub outs are pipes that stick out from a wall or pipe tee. Stub outs are also called stub-ups. They are capped until a branch pipe is attached. The branch pipe can be inserted after the pipe cap is removed.

24 Related Question Answers Found

What is a water stub?

Stub Out. The pipes that go to the toilets, sinks, showers and drains--as well as any pipes that vent to the roof--must be in place and tested before the walls are added. The process of laying these pipes, and putting protective plugs or caps to keep building debris out, is called a plumbing stub out.

What is a PEX stub out used for?

Stub out elbows primarily used when installing PEX pipe for plumbing applications and are used to stub out of the wall and allow for further connection of outlet stop valves and plumbing fixtures. PEX stub out elbows with ears can be nailed to a wooden surface, such as a stud.

What are stubbed utilities?

STUBBED-IN UTILITIES means-- usually-- plumbing i.e. gas, drain, waste and vent (DWV) and water supply, brought to the point of a rough inspection whereby walls can be closed up and the owner, tenant or buyer need only connect appliances and fixtures to make for a functional installation, at which point a final

How do you run PEX through existing walls?

A lesson on your home plumbing system - how it is set up and how it works. drill through sud and sill plate. Drill Through the Stud and Sill Plate. use nail plate as added precaution. Run the Water Lines. crimps are most crucial part of project. position fittings and solder in place. connect water lines to manifold.

How do you rough in plumbing?

Steps for Roughing in your Plumbing: Step 1)Mark Key Locations. Determine where all the toilets will be and mark its center on the wall and measure out 13 1/2 inches from that point. Step 2) Cut the Drain Hole. Step 3) Drain Pipe Installation. Step 4) Supply Line Installation.

How do you install PEX pipe in a bathroom sink?

It's pretty simple to use PEX. SharkBite recommends crimp rings be 1/8" to 1/4" from the end of the PEX. Slide your crimp ring over the PEX then the fitting into the pipe. Use your crimper at a 90 degree angle to the PEX and compress the crimp ring.

What is a stub up?

The 'Stub-up', or 90º bend is usually the first bend that an electrician learns. A 90º bend simply consists of one 90º bend at a desired distance from one end of a length of conduit.

Can a toilet and shower share the same drain?

Your shower drain can connect to the toilet drain, but it cannot connect to the toilet trap arm. So if your "main drain connection" is also the vent for the toilet, the line from the closet flange to the main drain connection is trap arm and the answer is no, the shower cannot tie in here.

Can two toilets share the same drain?

Most houses have more than one toilet, and if they are on the same side of the house, their waste lines can usually tie into the same stack. If they are on opposite sides, however, each may need its own stack. Since the stacks must be vented, this would mean two vent openings on the roof.

How far should a toilet be from a wall?

Standard drywall is 1/2 inch thick, so the plumber should set the toilet flange at least 15-1/2 inches from the center of the flange to the wall framing. The standard distance from the back wall is 12 inches, or 12-1/2 inches from the center of the flange to the wall framing.

What is the difference between a 10 and 12 rough in toilet?

Those numbers are a measure of the distance between the wall and the center of the closet flange (aka, where the johnny bolts that secure the toilet bowl go). Most toilet bowls will work with either a 10″ or a 12″ distance, but a 10″ rough tank is slimmer to allow for the decreased distance.

Bathroom Stub Out

Source: https://askinglot.com/what-does-stub-out-mean-in-plumbing

Share:

Wooden Bathroom Cabinets Wall

Wooden Bathroom Cabinets Wall

Large double mirror door bathroom cabinet in solid reclaimed wood, custom made in Somerset UK
Our latest bathroom cabinet is sleeker, taller and with much more storage space.

Our most loved eco-chic bathroom cabinet design has just been refreshed!

This new release of our two mirror door modern rustic bathroom classic is sleeker, taller and with much more storage space;

The impressively expansive mirror glass area of our grand bathroom cabinet really makes the most of any reflected light for extra illumination and enhances the illusion of a spacious bathroom. The increased reflection proportions will give you the freedom you need to focus on your personal styling.

This handmade solid wooden cabinet will fill a large wall space at a generous 80 cm wide x 70 cm high x 16.5 cm deep and with 3 shelves all of your bathroom cosmetics will be neatly stored behind the cleverly designed 'hidden handle' double doors.

Designed by Marc Wood and handmade by Marc and our talented team in our rural Somerset workshop, our signature traditionally hand-cut dovetail joints edge each of the mirrored door panels and we have used our favourite elegant finger joints for the smoothly contoured corners of the cabinet body. We specially select all of our timbers to beautifully showcase the natural character of the eco-friendly and sustainably sourced natural wood grain.

Our bathroom cabinets, storage cupboards and mirrors are each handmade to order from our Somerset UK workshop. We use traditional technique and sustainably reclaimed wood and FSC timber.
Our bathroom cabinets, storage cupboards and mirrors are each handmade to order.

We are always happy to create your ideal piece of furniture, speak to Marc and Rachel about how we can design the perfect accompaniment to suit your unique space.

Marc Wood Joinery; visit us online to find out more about our people and processes, visit our web gallery to see more beautiful, high quality custom handmade mirrors, frames, bathroom cabinets & furniture in reclaimed wood and eco-friendly FSC timbers.

View our Etsy shop or FB page; call us at our Somerset workshop 01460 241372, email marcswood@hotmail.co.uk and let us know how we can design and create for your home.

Wooden Bathroom Cabinets Wall

Source: http://www.marcswood.co.uk/tag/wooden-bathroom-cabinet/

Share:

Best Bathroom Renovation Company

Best Bathroom Renovation Company

freaking-out-over-your-paint-colors

Today, we are going to look at a bathroom renovation and what I'm recommending.

And especially, not recommending.

And yes, please be warned that this one is pretty snarky, but not without provocation!

Sometimes I feel it's just as important to talk about what not to do as what we should do. Because there's a lot out there that's not good. At least, that's what I think.

By the way… Remember our open-concept one-bedroom apartment renovation run amok? There's an open-house tomorrow. I hope the realtor brings a book or something.

For an apartment bathroom renovation, it's pretty simple. I would stick with something that coordinates with the kitchen.

Most apartment bathrooms are quite tiny, so there's only room for a small vanity, shower/tub and toilet.


Can you put in a pedestal or console sink?

I love them both and they are each appropriate to a large number of styles both modern and traditional.

However, logically, unless there's some other way you can get in some substantial storage, I would not advise that.

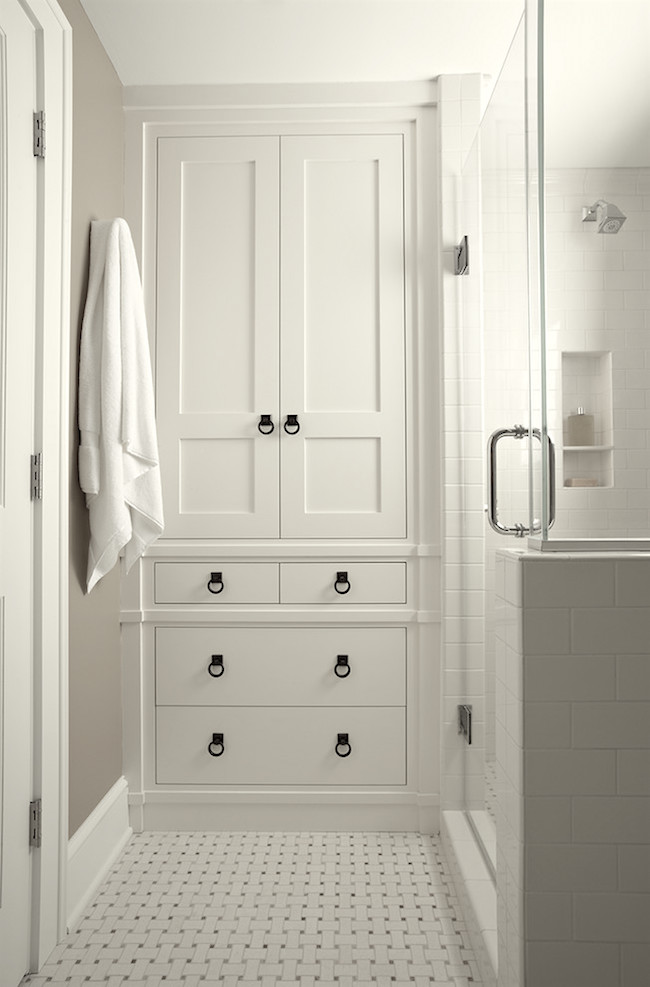
Astounding-Linen-Closet-Cabinet-Decorating-Ideas-Gallery-in-Bathroom-Traditional-design-ideas-

That works! Great bathroom!

(please make note of the door to the bathroom. We're getting to that.)

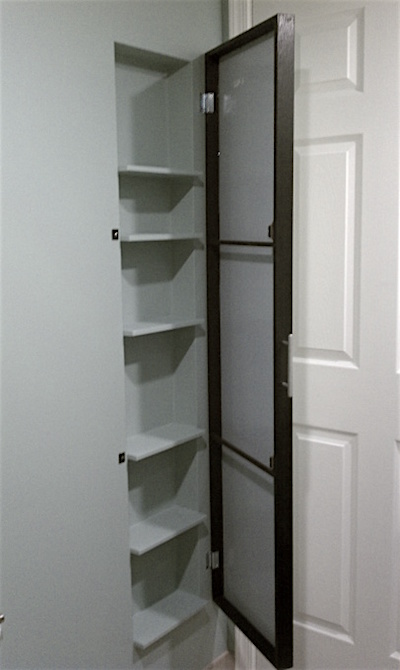
between the studs storage bathroom

Remember when we were discussing Unkitchens and storage and there were some great ideas for in between the studs storage? Well, that might be an option for a small bathroom.

There are a few other things that I would avoid in a small apartment bathroom renovation.

  • Avoid gaps between the vanity and tub. I have that and it's very annoying because stuff falls in there and is very difficult to get out.
  • Vanities with legs are great, but what would be even better is if there is a kick plate, a few inches back so that stuff that fell in on the sides doesn't accumulate underneath the vanity.
  • I recommend a bathtub/shower combination, even if you're not a bath person, it's better for resale.
  • Most of the time it's really best to stick with white for fixtures and tile, unless the style of your home definitely dictates something else.

Please learn from history.

retrorenovation-vintage-pink-and-blue-bathroom

This one scares me.

retrorenovation blue 50s bathroom renovation

There is actually a trend to recreate these vintage bathrooms.

Fine if you live in Williamsburg (Brooklyn) New York.

Otherwise, I don't recommend that.

Both images via: Retro Renovation

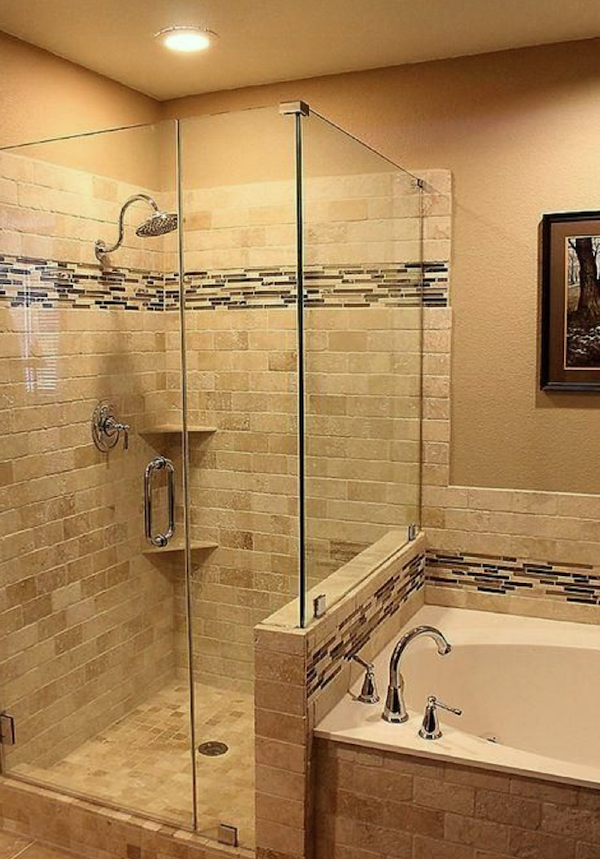
  • In addition don't feel that you have to add a tile border for some "color" or "interest." IMO, it usually looks too busy, too dumb and can also be limiting.

Screen Shot 2016-06-25 at 5.17.55 PM

This bathroom would be far more elegant, IMO without the busy border.

If you want to see some color, paint the walls, put up art, towels, A vase, if there's room, pretty bottles, etc.

But here's the disturbing bathroom renovation trend that has left me immensely bothered and bewildered. (but definitely not bewitched)

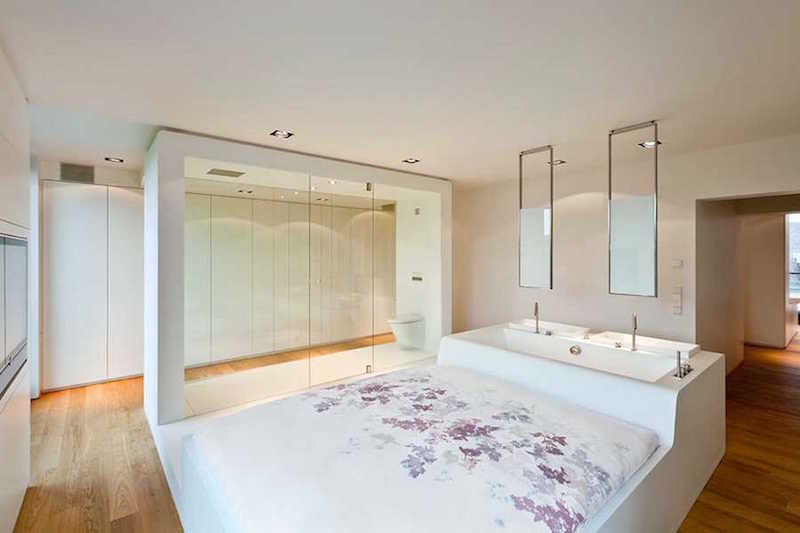
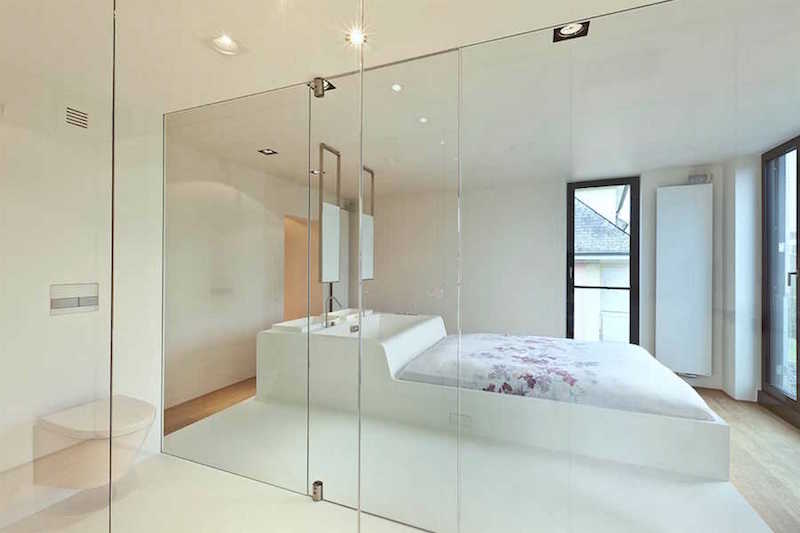
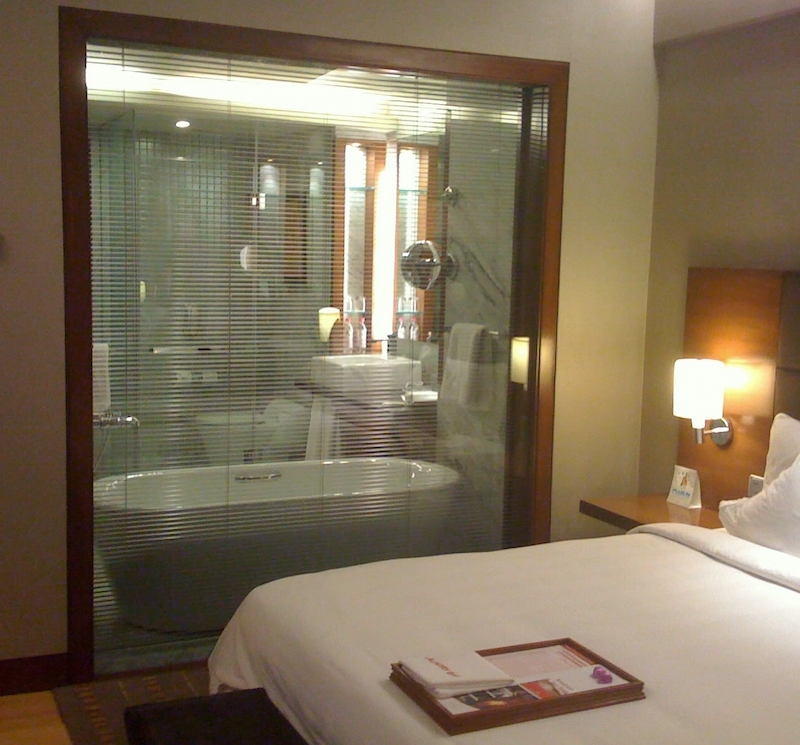
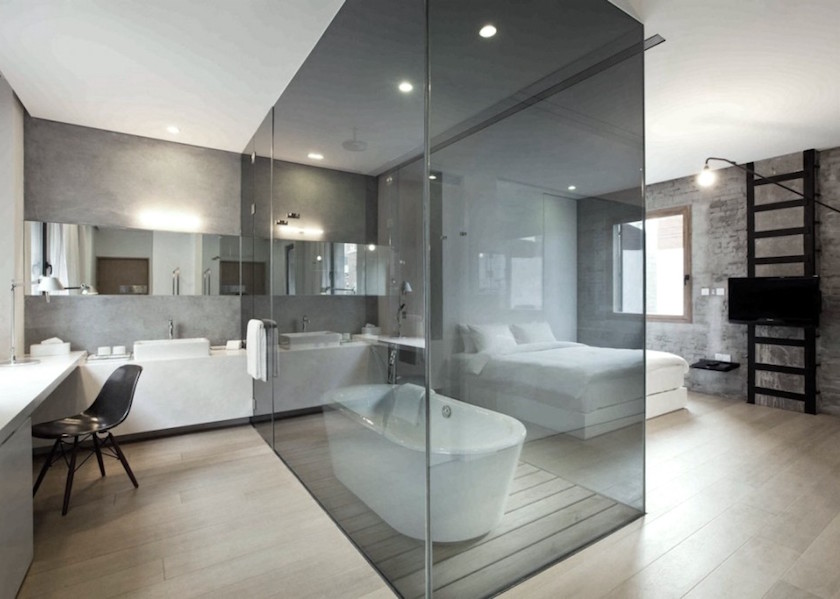
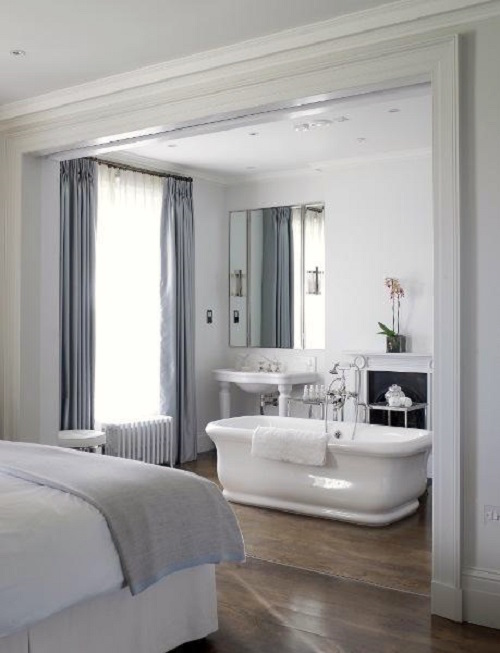
The Open Concept Bedroom/Bathroom

I mean like the poo pot is IN the area that is used for SLEEPING.

Wha???

AND the shower, bathtub.

Water, water everywhere…

bathroom renovation mistake

And the results…

(BTW, if one of these bathrooms happens to be yours and you feel highly insulted. That's perfectly understandable. Just kindly ask me to take it down and I will. )

residence_building_cessange10

There are just some things I like to do in private. Ya know?

You have to see the rest of this place. It's pretty wild!

residence_building_cessange28

A bathtub headboard?

"Oh honey. Sorry. Did I wake you? Here's a towel." haha.

popularni-prozori-savremenog-dizajna-prikaz-prelepog-ambijenta-uskladjen-sa-vasim-otvorenim-prizemljem-modernog-dizajna

It appears that folks who like to put up mega-expensive frameless glass (and unsafe, in this case since you can't see it) walls, also don't like to put up window coverings.

mastercity_56a8cb76bcf669.75537259

No.

lovely-modern-elegant-master-bedroom-decorating-ideas-bedroom-with-bedroom-elegant-master-bedroom-design-ideas-photo-best-elegant-bedroom-decorating-ideas-1024x768

Is that the living room in the background?

modern-bathroom-with-bedroom-design-2

This is getting out of hand.

This one reminds me of a diorama at the Museum of Natural History.

28cityroom-diorama-superJumbo

bedroom-bath-ideas

For the love of…

I understand that it doubles as a hyperbaric chamber.

But really. Could we get a little ventilation in there?

Undoubtedly, this trend may have started in some boutique hotel trying to be different.

Indeed.

But as I always say. "Just because you can, doesn't mean you should."

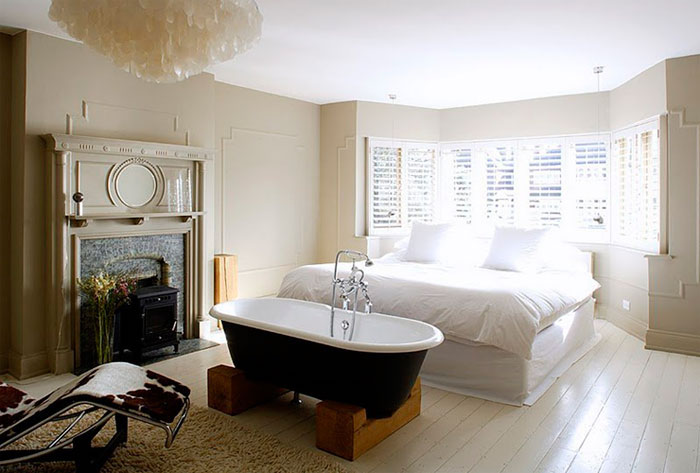
However, it's not just contemporary/modern bathroom renovations that have been invaded by the open-concept en suite loo.

vannvsp10

There's the bathtub footboard on blocks competing with the gorgeous mantel. Why?

richard powers photography open concept bathroom renovation

This one's covering up the fireplace.  Okay, maybe the FP doesn't work. But why can't we at least have a lovely drape to close if necessary? Or bi-fold opaque glass French doors?

6.6 million bathroom in bedroom

Same here. And no. There isn't a pocket door because the wall isn't thick enough to accommodate that. Love the French doors. Drapes?

Screen Shot 2016-06-25 at 5.19.31 PM

Such a gorgeous room but what IS that thing?

This is reminding me of something.

Who remembers the Leave It To Beaver Coffee Cup Episode?

leave it to beaver coffee cup

haha


Are they any situations where an open concept bathroom works?

Rarely and really, can we at least have a separate WC?

That is IN a closet?

With a door?

But here are a few pretty cool, open concept bedrooms with a bathtub.

427731_311594265553314_208901872489221_874349_682636098_n

This one feels genuinely like it was always like this.

bedroom-bathroom-3-1024x760

Great colors and at least they put in a sliding garage door. ;]

There are some elements that I love here and some that confound me. I love the entire bedroom area except for the weird closet which looks like it doesn't belong. It's also butting up against the drapery which is a no-no.

If they had actually put up a wall or left it as it was, (parallel with the window wall) they could've put in a closet. I find the positioning of the shower stall very strange as well.

The block pattern floor is cool, but I think it's too much to run it up the wall.

A lot of these bathroom issues could be solved with opaque glass doors. Then, light could come in and it would be architecturally lovely, I think.

034536f1ab5b

I think this one works because of the opaque glass doors, the drapes. And the shower stall feels integrated and jewel-like. Very pretty!

Happy summer!

xo,

Laurel

Best Bathroom Renovation Company

Source: https://laurelberninteriors.com/2016/06/25/bathroom-renovation-trend-avoid/

Share:

Bathroom Tile Blues Lyrics

Bathroom Tile Blues Lyrics

6 Things to Know Before Painting Bathroom Tile

Brush up on all the details surrounding this bargain bathroom rehab option.

Gone are the days when your only option for refreshing dingy, dated, or plain-Jane bathroom tile was to rip it out and replace it. Today, commercial paints formulated for use on tile make it possible to restore the look of your tile floors, walls, and other bathroom surfaces—or lend them a new one altogether—with little more than a can! Simple as it sounds, painting bathroom tile shouldn't start without first evaluating key project considerations and constraints. Below, we've outlined the six things to know before you even pick out a paint color.

Painting bathroom tile is much cheaper than retiling.

You've heard it before: Paint is an economical material. Unsurprisingly, then, it's the most budget-friendly way to refresh bathroom tile that isn't cracked, crumbling, or otherwise structurally compromised. Frugal do-it-yourselfers can spend as little as $100 to paint 100 square feet. Meanwhile, depending on the tile material, a DIY retiling can cost anywhere from $100 to $1,500 for a typical bathroom floor measuring 35 to 100 square feet. Retiling a tub surround or walls of a shower stall between 9 and 13 square feet, too? That'd be another $400 to $1,300, according to the online planning tool, CostHelper.com. Solid-colored tile in bargain materials like ceramic falls at the lower end of these price ranges, while patterned tile in premium materials like marble falls at the higher end—as much as 15 times the cost! Patterns in painted tile floors, on the other hand, would only cost you double or triple the expenses for materials (depending on how many colors) and time.

6 Key Tips for Painting Bathroom Tile

Photo: istockphoto.com

It affords endless looks.

Popular bathroom tile materials—ceramic, porcelain (a subset of ceramic tile), natural stone (marble, travertine, slate, granite, or limestone), and quarry tile—are sold in a number of solid colors or patterns. Still, those preset styles might not suit the design of your bathroom, go out of fashion after you've installed them, or, be simply too cost-prohibitive to install. With paint, you can lighten, darken, or apply a pattern of your own design to your tile to fit any bathroom aesthetic, from a retro checkerboard pattern to a cool and contemporary geometric design. And, should your style change in three years, you can easily repaint.

Keep in mind that brighter paint colors are a better option for space-limited bathrooms; darker paint absorbs light and can have the effect of making a small bath look more constricted.

RELATED: The Best Painted Floors on the Internet

It's not practical to paint tile on all bathroom surfaces.

With the exception of glazed quarry tile (which doesn't bond well with paint), you can apply paint to most popular types of tile: ceramic, porcelain, natural stone, or even un-glazed quarry tile. But your paint job will last the longest on tiled bathroom surfaces that receive low to moderate exposure to moisture—think bathroom floors (outside the immediate vicinity of the tub), walls, and backsplashes. Tiled countertops, tub surrounds, or shower surfaces, while paintable, aren't as practical surfaces for this treatment in the long-term because the paint is more likely to prematurely fade, peel, or blister with regular exposure to water. That said, if you are on board for frequent touch-ups or re-application until your budget allows for a full bathroom remodel, this fix might be just the ticket!

Don't want to do it yourself?

Get free, no-commitment estimates from pro painters near you.

HomeAdvisor Logo

+

BobVila.com Logo

It's crucial to pick a paint that's right for the tile material and bathroom surface.

Ceramic, porcelain, and unglazed quarry tile can take either latex or epoxy paint in one-part (pre-mixed) or two-part (ready-to-mix) varieties formulated for interior use. Latex paint ($10 to $30 per gallon) is generally less smelly and toxic. Unless you choose a pricier mildew-proof variety, though, it readily weathers with heavy moisture exposure and therefore should be saved for bathroom floors or walls. For the "splash zones" of backsplashes, countertops, tub surrounds, and shower surfaces, epoxy paint ($20 to $35 per gallon) does the trick. This type of paint cures into a harder, more durable coat that boasts more resistance to moisture, heat, and everyday wear-and-tear than its latex counterpart. You might look for a well-reviewed two-part epoxy specifically designed for specifically for tubs and tiles, like this Rust-Oleum refinishing kit—available on Amazon and elsewhere—that's been reviewed nearly 2,000 times.

Natural stone tiles, on the other hand, need an acrylic latex paint formulated for interior masonry or stucco ($20 to $35 per gallon). All of these paints come in a full spectrum of sheens ranging from flat to high-gloss. The glossier the finish, the more slippery the painted tile will be. Flat and matte sheens afford the most traction underfoot, while semi-gloss and high-gloss sheens offer the least, a disadvantage on already slip-prone surfaces like shower floors.

RELATED: Solved! How to Choose the Best Paint for Bathrooms

It can put your bathroom out of commission for a weekend or longer.

The task of painting bathroom tile can be divided into five stages: surface preparation, priming, painting, pattern application, and sealing. Total time spent on the project will depend on the dry time of the primers, paints, and sealers you're using; the complexity of the pattern you're applying; and the extent of the project, be it a few accent tiles on the backsplash or the whole wall. Here's what you can expect:

  • Surface preparation entails sanding, vacuuming, and then scrubbing the tile and grout lines to remove dirt and grime.
  • Priming the tile  is essential to making the tile more receptive to paint. Use epoxy or urethane primer for ceramic or porcelain tile (view example on Amazon), masonry primer for natural stone or unglazed quarry tile (view example on The Home Depot). Read and adhere to the primer's instructions for dry time—you won't want to cover something that's sticky.
  • Painting the bathroom tile  can involve either rolling color onto large swaths of tile at a time or brushing individual tiles by first "cutting in" around the edges. The latter method would rely on an angled brush and a steady, precise hand in order to avoid sullying grout lines or neighboring tiles, and that can drag out the process. If you're doing more than a few accent tiles this way, plan accordingly. Then, while the paint dries over the next two or more days, you'll need to avoid touching or walking on it.
  • Applying pattern to the fully-cured tiles typically entails taping a store-bought or homemade stencil to the tiles you want to pattern, then rolling over the stencil with a roller cover saturated in the same paint you used for the tile. Again, wait out the full dry time.
  • Finally, sealing the painted bathroom tile  protects your project from grime, scuff marks, and scratches. Your clear sealer (urethane sealer for ceramic or porcelain, or masonry sealer for natural stone or quarry tile) also has a dry time you'll want to factor into your planning. Only after you've waited the full time should you begin to use the bathroom.
    All in all, you could be looking at a project that puts the bathroom out of order anywhere from two days to several days. And, when you're thinking about putting fresh paint on floors, you can't even get away with walking into the bathroom to grab whatever facewash you unintentionally left behind, so be sure to take all the essentials out with you before you start!

It needs minimal maintenance.

It doesn't take much but regular sweeping, vacuuming, and mopping the sealed painted tile with a store-bought or homemade tile cleaner that's tailored to your tile in order to retain its color and fend off abrasive dirt. However, laying mats in high-traffic areas and floor pads below furnishings on the tile can prevent scuff marks or impressions from marring the paint job. If blemishes do appear in the paint job, simply use an artist's paintbrush and your leftover paint to make touch-ups, then allow it to dry completely before re-sealing that portion.

Don't want to do it yourself?

Get free, no-commitment estimates from pro painters near you.

HomeAdvisor Logo

+

BobVila.com Logo

Bathroom Tile Blues Lyrics

Source: https://www.bobvila.com/articles/painting-bathroom-tile/

Share:
banner